Table of Contents
- Setting up Screener and Survey questions
- Screeners
- Surveys
- Features included in both Screener and Survey questions
- Skip Logic and how to use it
- What are Screener and Survey Templates?
- Preview your Screeners, Surveys, Signup Forms, and even your Unmoderated Test
- How to export Participant Responses
- Have Questions?
Screeners and Surveys
 Updated
by Billy Dowell
Updated
by Billy Dowell
- Setting up Screener and Survey questions
- Screeners
- Surveys
- Features included in both Screener and Survey questions
- Skip Logic and how to use it
- What are Screener and Survey Templates?
- Preview your Screeners, Surveys, Signup Forms, and even your Unmoderated Test
- How to export Participant Responses
- Have Questions?
Setting up Screener and Survey questions
When setting up studies, you will see options to create Screener or Survey questions, depending on your study type.
In this guide, we are going to talk about setting up your questions, their features, when to use screeners, how to use Skip Logic, and Advanced Skip Logic.
Where are Screener questions used vs Survey questions?
Screener questions are now available for all study types!
Survey questions are used in Survey studies, as well as Panel studies, but are referred to as a Signup Form.
Screeners
Why would I want to use Screener questions?
Screener questions allow you to gather information about your participants to help determine whether they qualify to participate in your current study, or if they would maybe be a better fit for another, later study.
- e.g., If you are conducting interview studies about a person's favorite vacation spots outside your country, you may want to create a screener that asks questions about your participants' vacation habits. If you have participants apply to the screener that have never left the country, you may not want to conduct an interview with them, at this time.
- Their screener replies are saved within the study and tracked in their profile, and can be reviewed any time, even if you decide not to conduct interviews with them.
Features specific to Screener questions
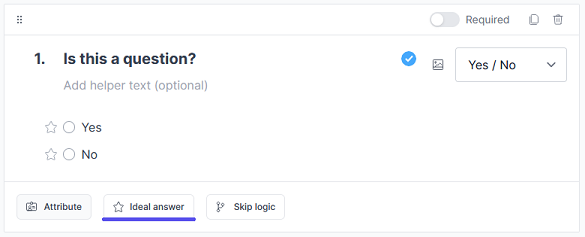
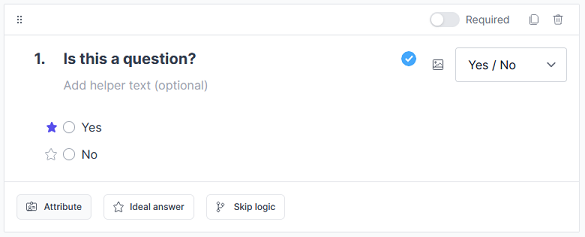
Screener questions can have Ideal answers to help with the review process. Ideal answers can be selected to set the desired responses for Manual or Automatic review.
- To select Ideal answers, click the star icon next to the desired answer choice.
- If using Single Select question types, for example, more than one ideal answer can be selected by changing the "Is exact match:" to "Contains any of:", and then selecting your ideal answers in the list.
- For each answer type, the Ideal answer button can be clicked, allowing you to change "Is exact match:", "Contains any of:", "Equals:", etc...
- Automatic review is used to set up the study so that candidates can schedule right away if they match all Ideal answers.
- To enable Automatic review on draft studies:
- Click on the gear icon in the top left corner.
- Select Automatic review.
- To enable Automatic review within published studies:
- Select an ideal answer and then click on the Settings tab under Screener.
- Select Automatic review. Changes are saved automatically and noted by a green popup message.
- To enable Automatic review on draft studies:

Surveys
Why would I want to use Survey questions?
Since survey questions are specific to Survey studies and Panel studies (Signup form), they would only be used when you want to capture information about your participants without needing to identify whether they are qualified or not.
- e.g., If you do not plan on conducting interviews to gather additional information, and you only want to know about people's traveling habits, you can use a Survey study with survey questions to capture that data.
- Or, if you are wanting to add participants to your panel, you can use survey questions (Signup Form) to capture general information that you find relevant for your requirements.
Features included in both Screener and Survey questions
The different question types and what they mean.
There are multiple question types to help you get the information you need:
- Short Text: Used to capture quick answers or information based on the participant's input.
- Long Text: Used to capture more detailed answers or information based on the participant's input.
- Email: Used to capture a new email address, such as an alternate or preferred email address.
- Number: Used to capture answers containing only numbers. Special characters are not accepted.
- Website: Used to capture a URL based on the participant's input.
- Yes / No: Used to capture yes or no answers.
- Multi Select: Used to capture one or more choices from a list of choices.
- Linear Scale: Used to capture answers on a scale of anywhere between 0 and 10.
- Single Select: Used to capture a specific choice from a list of choices.
- Info: Used to provide information to your candidates. Not used to capture information.
- Date: Used to capture a specific date based on the participant's input.
- Location: Used to capture locations based on the participant's input.
Attributes and how they used for questions.
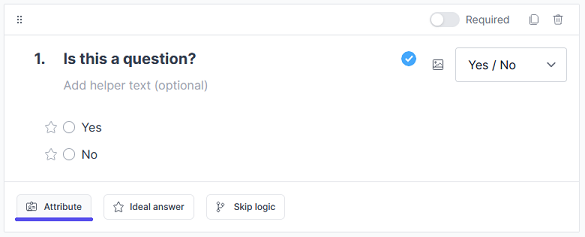
Under each question, there is an Attribute button, which allows you to convert the question into an existing or net new attribute. By doing this, candidates’ responses will be added to their profiles under that attribute, so you can search and filter for them later.
For details about the different attributes and how they are used in the candidate profile, check our Candidate Attributes guide.
To use attributes in your questions:
- Click on the Attribute button
- Search for the attribute you want to use and select it.
- You will only be able to select attributes that can be used for your question type.
- If you do not see the attribute you want, you can create a new one by clicking on Save this as a new attribute.
- Once selected, the Attribute button will change to the attribute name.
- To remove, click on the attribute and click Remove at the bottom of the dropdown modal.
Adding images to questions
Images can be added to questions for your participants to review.
- Images cannot be added as answers options, at this time.
- Click on the image icon next to your question.
- In the modal that opens, click to open your file browser, or drag and drop an image into the modal.
- Once an image is selected, or dropped in, the modal will go away and the image will be applied to the question.
Users can click to zoom on the image while setting up questions, and participants can click on the image to zoom in as needed.
Skip Logic and how to use it
Skip logic allows you to set up multiple questions and have participants move from one question to another based on their answers to the previous question.
You can also use Advanced Skip Logic per question to create multiple paths for your participants. Details in steps below.
Skip logic can be used in Survey studies, Panel studies, and Customer Interview studies with Screeners.
How to set up Skip Logic
Once you have your study created and are on the Survey or Screener step:
- Start by creating your questions. You will need more than two questions.
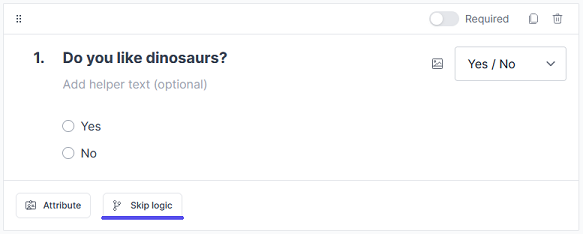
- Scroll back to the question that you want your skip logic to start at.
- Click the Skip Logic button.
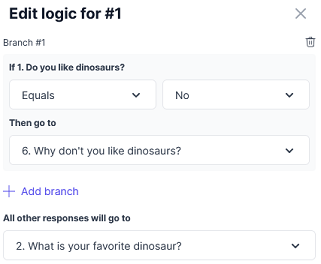
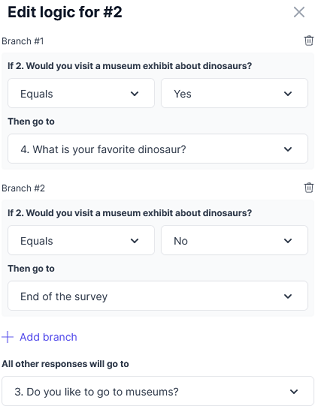
- In the right-side modal, start by selecting your first rule, which depends on the question type.
- After setting up the rule, choose which question you want participants to be directed to.
- To use Advanced Skip Logic, you can click + Add branch, which will add an option for a new rule.
- Set up your next rule and then choose an alternate question that they should be directed to.
- Once all skip logic options have been set, click on Save at the bottom of the modal.
- Repeats for any other questions that you want skip logic applied to.
What are Screener and Survey Templates?
Screener and Survey templates are your premade survey questions that you can use on any survey, preventing you from having to retype every question and answer choice again and again. More on creating templates in our Survey Templates guide.
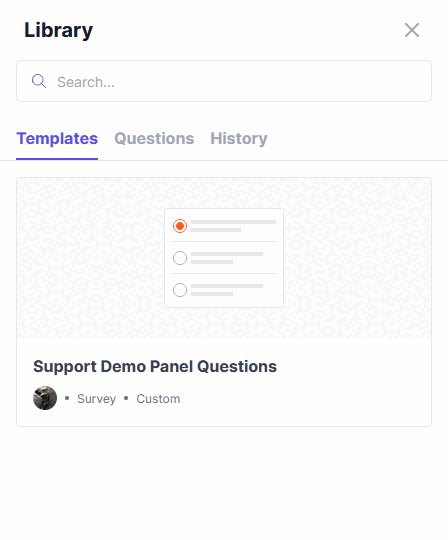
Applying a Screener or Survey Template via Library
Once you have one or more templates created, you can start applying them in your draft and published studies:
- Start by clicking Screener, or Survey (depending on your study type), on the left-side menu.
- Click on the Library icon in the top right corner, seen below.

- Ensure Templates is the selected tab. (it should be, as it is the default)
- If you have multiple templates, you can search for the one you want at the top of the slide-out menu.
- Click to select the template that you want to use.
- Click Use this template.
- Click Confirm in the confirmation message.
- If you change your mind, after clicking Confirm, just delete the questions you want to remove, or select another template to replace all questions.
Other options in the Library
Not only are Templates house in the Library, but you will also see Questions and History.
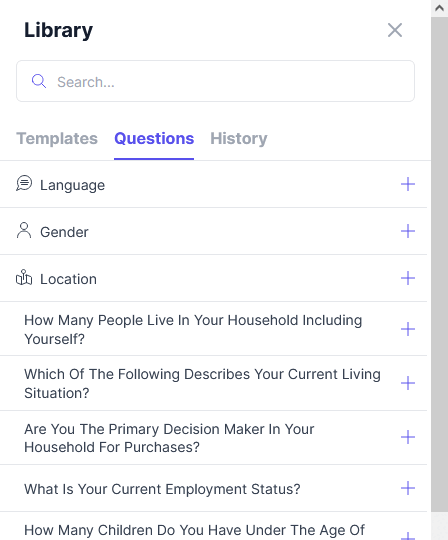
- Questions contains common default/example questions that can be used for any study.
- History contains a list of questions that you have typed up and added into other studies, or questions that have been applied from templates.
- These questions also include the answers that were applied, and can be changed as needed once applied.
Each option allows you to apply the question by clicking on the ➕ to the right of the question.
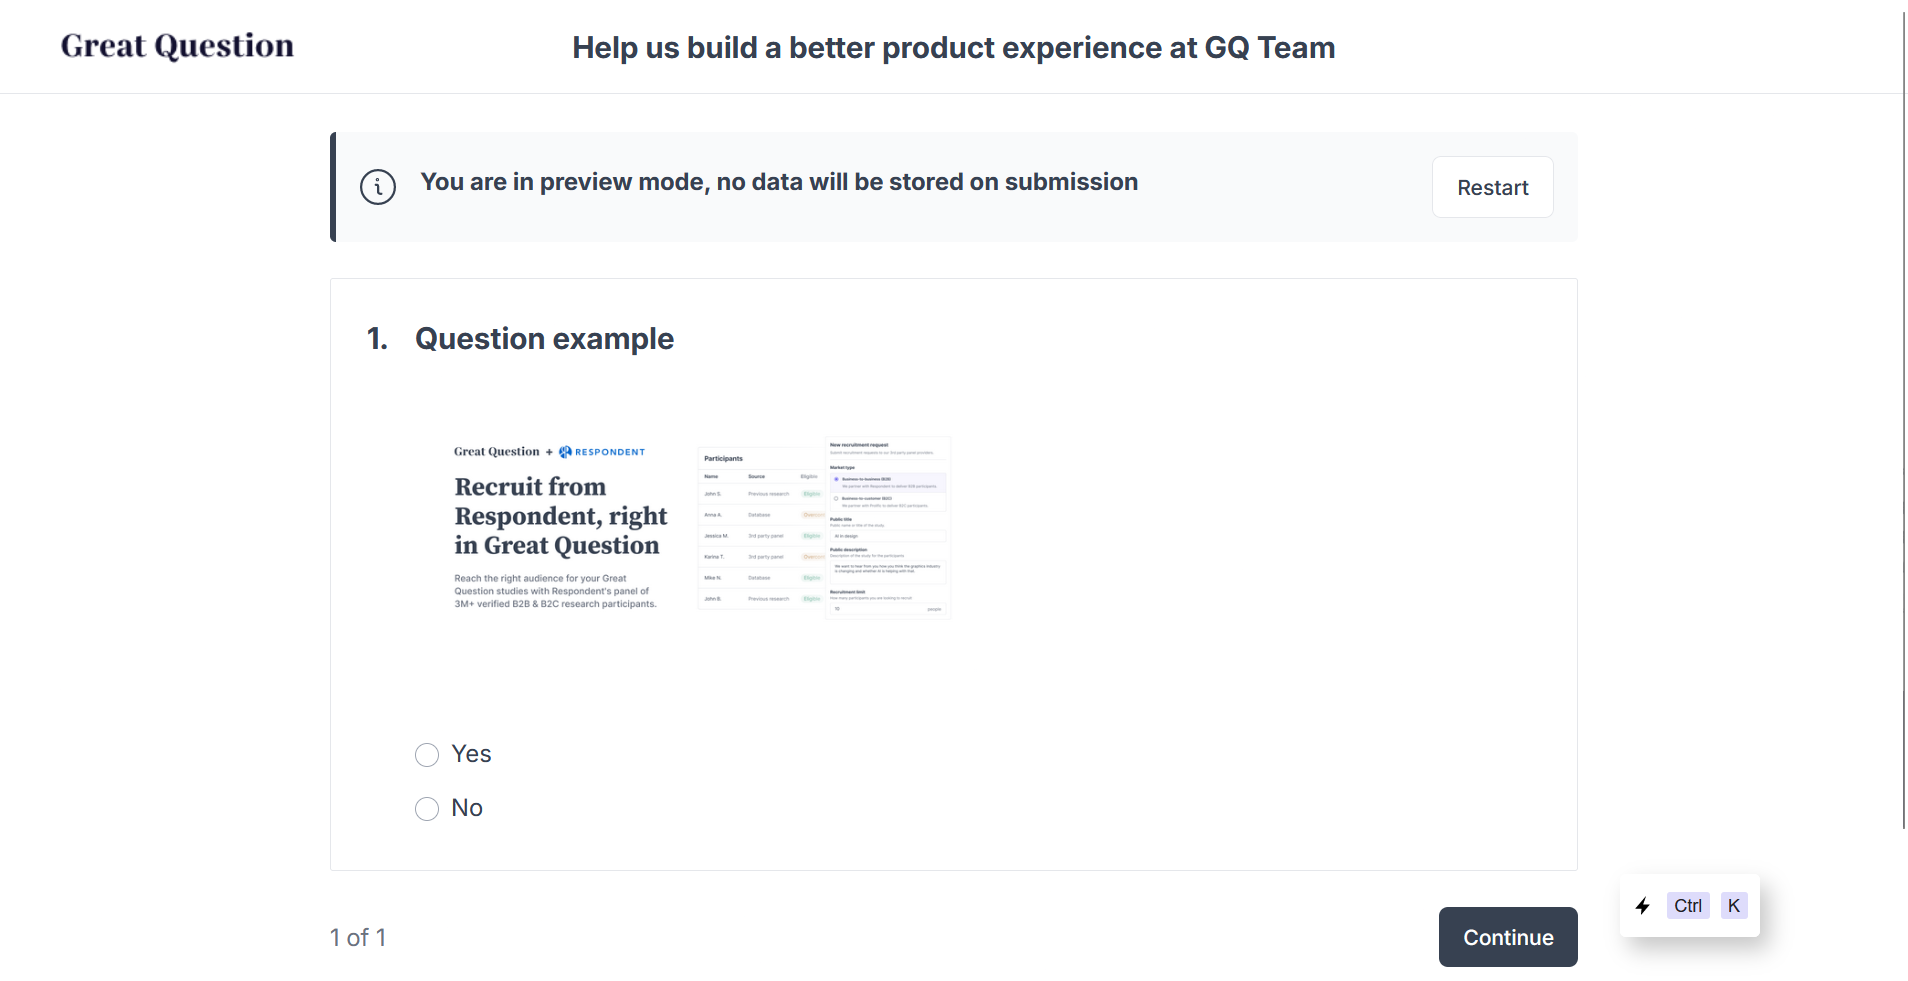
Preview your Screeners, Surveys, Signup Forms, and even your Unmoderated Test

You can preview your screeners, surveys, signup forms, and unmoderated tests by clicking on the Preview button, shown above.
- The preview will allow you to check, test, confirm, and experiment with your questions and settings.
- Preview data is not saved, and can be used as many times are you want.
- To reset your preview, click Restart at the top.
How to export Participant Responses
Survey and signup form responses

- Click Repository from the study's menu.
- Select Summary responses or Individual responses (either will provide the same export results).
- Click on Export to CSV in the top right corner.
- Check your downloads folder to confirm the file has been downloaded.
Screener responses
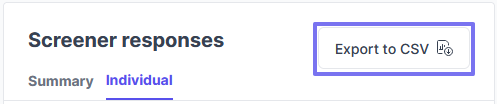
- Click Screener responses from the study's menu.
- Select Summary or Individual (either will provide the same export results).
- Click on Export to CSV in the top right corner.
- Check your downloads folder to confirm the file has been downloaded.
Have Questions?
Please reach out to us in the chat or at [email protected]!